Transferring
There are several types of transfers: Drag-and-Drop, Finder copy, Bring Into Target, and Spot to timeline and Mirroring. These apply to both single file transfers as well as multiple file(batch) transfers.
As a way to quickly understand the differences, these v4.5 tutorials still apply to the concepts here and are worth reviewing:
Transcoding
Spot & Bring Into
Overview
Drag-and-Drop
Drag-and-Drop transfers mimic the Apple convention allowing one application to ‘move’ a reference to a file to another application. This is achieved in V5 by simply clicking and dragging files from the browser to the target application. You can also select multiple files both continuously and discontinuous and click and drag them to a target. In addition the user can employ the SEND TO APP feature. The SEND TO feature delivers the file to the target APP in the same way. Be careful to set the target in the DAW Menu to your desired application or you will get undesired results. Both methods are essentially the same and have the same result. The user should be aware that the receiving application, in these methods, always governs the rules of transfer, including any subsequent copies if applicable. Since the receiving application is determining whether new copies will be made or not, there can be no change to the filename in this transfer. So applications will simply play the file from the original position while other applications may enforce a copy upon drag/send. If copies are made, it is more likely that metadata will be stripped by the copying application. This method is very simple and reliable, but users should be aware of its limitations.
Finder Copy
A Finder Copy is similar to a Drag and drop in the sense that no filename change or conversion is performed. This type of transfer is akin to making a copy in the Apple Finder, hence the name.
How do I make a finder copy? Like a Drag and drop, click and drag the file to the desktop or a location accessible in the finder. Press and hold the OPTION button. The “secret” is to not touch the keyboard until you are just about to let go of the mouse. It will turn the cursor into a plus sign (+). Let go in the target you desire and a simple straight copy of the original will be made. We also have a free utility which can be paired up with v4.5 and it appears in your DAW menu allowing you to batch finder copy items as needed. Contact support@soundminer.com.
Smart Drag
In addition, Soundminer, has an added an additional option for this kind of transfer. This is called a ‘smart drag’. And it is accomplished using the waveform editor. It can be applied only to one file at a time. In the waveform overview, you will notice an icon at the top of the pane:
This icon allows you to make a drag from the editor to the target forcing a copy of the entire file or current edit, with all the metadata in the copy and according to the settings in your Transfer preferences. Because it’s making a new piece of media with whatever in and out points you have set, along with pitch and plugins, it needs to make a new file. Because of that, this function is not available when referencing original. Handles are also not supported(as there is no way to convery a “region” when using the os' generic dragging routines)
Bring Into Region
Although similar in name to SEND TO TARGET, there is a big difference in this type of transfer. BRING INTO REGION(cmd-B) allows you to determine the copy parameters as well as the naming convention used for the resulting copies. Using this method allows you to have Soundminer determine the application specific copy parameters desired. The most common application specific transfers are those for Avid’s Pro Tools (BRING INTO REGION and SPOT TO TIMELINE).
Spot to Timeline
This transfer feature is a more refined application specific transfer that allows a user to copy, convert and place a sound directly on a track at a predetermined location. Not all supported application recognize this option. It requires a special recognition on the part of the receiving application to direct a Soundminer transfer to the timeline.
This Manual will focus on using Pro Tools(although the SPOT API is support by Stienberg Nuendo, Apple Logic and Reaper).There are specific characteristics and limitations when working with any of the above Digital Audio Workstations. Please familiarize yourself with them as noted in the remainder of this section.
Application Specific Transferring with Pro Tools
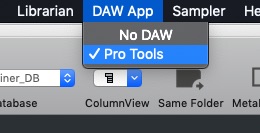
Users need to make sure first that the DAW menu sees the intended target and you need to select it so it knows that is the destination. You can have multiple DAWs present, but transfers will be sent to the DAW selected in this menu.
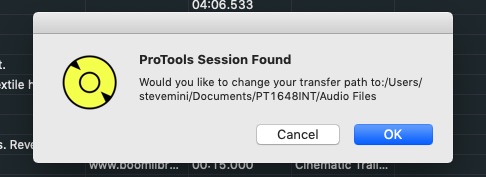
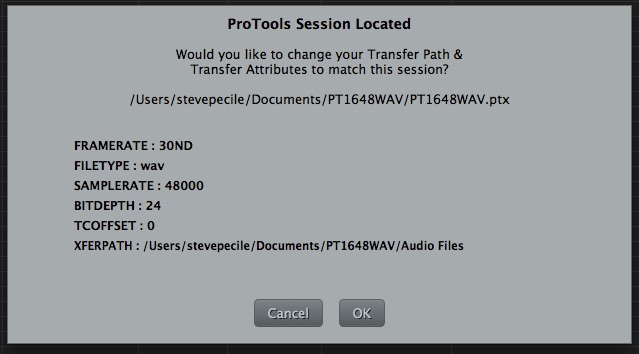
There are a number of rules imposed on all transfers into Pro Tools and it is imperative you follow them to assure proper transferring. This is controlled in your v4.5 Preferences|Transfers area. Soundminer v4.5 should, however, do all that for you as soon as it recognizes that Pro Tools is running. When it senses Pro Tools is active, it will read the session’s parameters and present you with a confirmation or notification of change page:
If auto-sensing does not work for whatever reason, Soundminer has the ability to automatically set this up by having the user drag and drop the intended Pro Tools session onto the Soundminer Browser or onto the Soundminer icon on the Dock.
If instead of copying and converting files into the Pro Tools audio files folder you wish to reference the original files and their positions, those originals must match the current Pro Tools session and Pro Tools naming rules or Pro Tools will enforce a copy.
All your transfer settings will be changed to match this Pro Tools session and your new transfer path will be confirmed at the bottom of the interface:
With this now set, a user can safely transfer into Pro Tools using the Spot to timeline or batch transfer (cmd-B) options.
Tag to Spotting folder
Soundminer has many ways to transfer, and in considering which method is best suited to your workflow, you need to also consider the use of the Spotting Panel. In the right panel, there is an option for Spotting. This area is designed to give user greater control over their transfers. For those who need to make lists, folders and create organization, this panel is something you need to understand. If, however, you plan to simply work fast with no need to organize such transfers, then you should leave this option unchecked(default) so files you transferred are not tracked by the spotting panel(Preferences>General)
Troubleshooting
Check the online help - https://info.soundminer.com/support
© 2020 Soundminer Inc.


