Proxy Maker
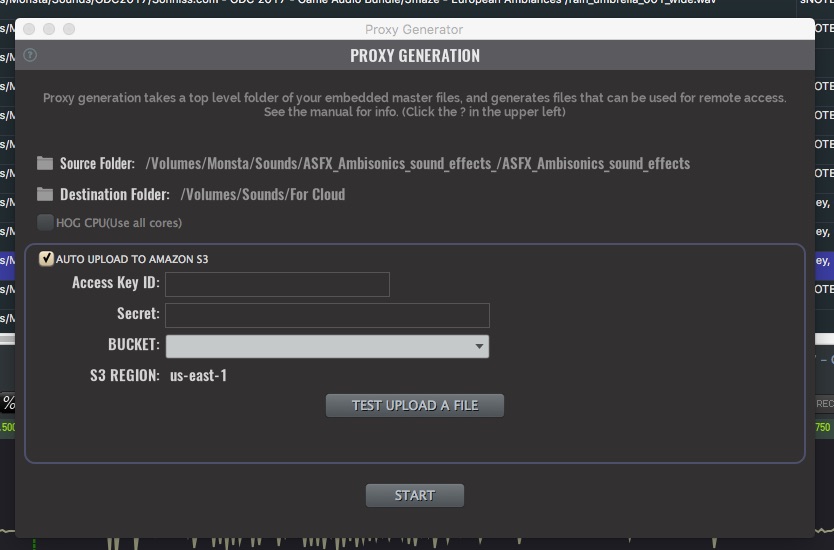
The proxy maker window is accessed from the Librarian Menu. It allows you to generate all the proxy material from a folder of emebedded soundfiles, and can optionally also upload that tree of files. Just like the mirror operation, it’ll iterate over every item in that folder and dive into folders, recreating the tree.
A number of files are created… If the files exist already they are skipped. So you can just redo the operation periodically and it’ll just upload the new material, and update the metadata files.
- FLAC file. When actually transferring from Soundminer, this is accessed. Typically FLAC files are 50% of the original file size, so you save a lot of bandwdith. The quality is lossless.
- OGG file. Lossy, but only used for auditioning. It’ll be the same sample rate as your source file, so you can make good judgement calls on pitch shifting. It’ll also be multichannel like your source file.
- SMWF file. A special file that contains the multichannel waveform information.
- soundminer.meta file. Another special file that is a collection of all the metadata for that directory. For future use.

Clicking on Source tells the proxy maker where to start looking for audio files. It’ll go into every folder below this level. You will want to make sure the files are embedded for future use. Its not imperative, everything will work just fine, but better to be ahead of the curve!
The Destination is where the proxy files should be written to. You want to make sure there is enough free space on the drive to hold everything. If you take 80% of the space reported by the Finder when looking at Source(assuming your source files are wav or aif files), then you should be safe. If your source files are flac, you’ll want about 15% more space for the other files.
The HOG CPU toggle only applies when not uploading to S3. If you want to keep working on the same computer while it works away, chances are you want to keep this off. However if you want it to work as fast as possible then toggle it on. It’ll use all the CPU cores on your computer to do the conversion. When uploading to S3 the bandwidth(unless you have a really, really, really fast pipe) will be the bottleneck, so will keep the CPU usage in check.
This is the section that allows you to also upload the files to an Amazon S3 bucket. We have a whole section in the manual dedicated to walking you through the process of signing up.
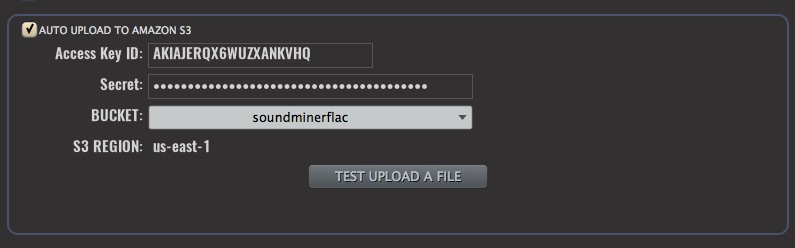
After you’ve done that and created a bucket in your region, you can enter in your ACCESS ID and Secret Key. After putting in your Secret Key, hit return or tab, and the application will get a list of the buckets in that account. Choose the bucket you created, and that’s it.
The test button allows you to pick any file on your system and uploads it to the root of the bucket. Any errors will be reported. You can also browse through the S3 bucket using the aws.amazon.com console.
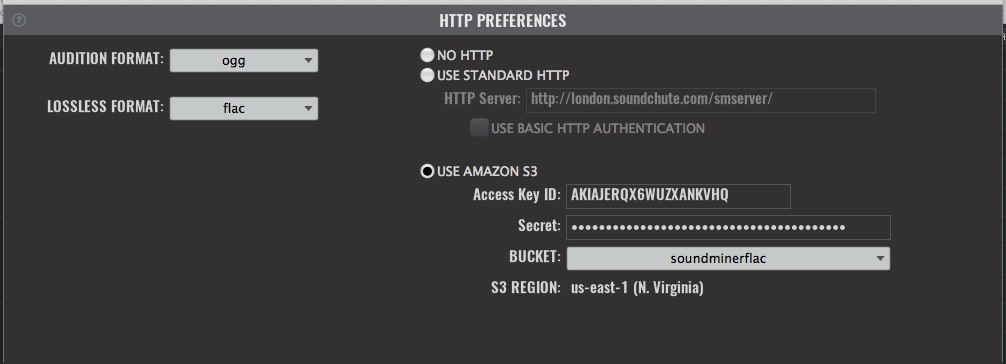
From an editor view now… You need to have a database(either local or Server) that references those original wav files. You go to preferences, enter in your credentials(these can be read only access IAM keys), make sure your audition format is OGG, your Lossless format is FLAC. Now when the editor goes to play or access the file, Soundminer see’s the file isn’t found so tries to find an OGG file at that path in the S3 bucket.
Speed Increase with compromised security
If you want slightly speedier access and aren't too concerned with potential hacks, you could make every item in the bucket public(but still hide directory listings so someone can't just view the directory tree, they'd need a database to get the url), and then just use standard http with the bucketname.s3.amazonaws.com. This would be ok if you were the only owner of the sounds and weren't giving out access to anyone else. So in this screenshot it would be https://soundminerflac.s3.amazonaws.com. (If you do decide to do this, just go to that url in a web browser and make sure you get Access Denied)
© 2020 Soundminer Inc.